Showing posts with label blog challenges. Show all posts

Wednesday, January 2, 2013

Sparkle Snowflake Thank You

Yesterday, I made a special thank you card for my Niece and Great Niece for their lovely and thoughtful Christmas presents. I haven't been around them much over the years, but this summer we spent some time together and they surprised me this Christmas.

Here is the Card

This view shows a better look at all the bling and Snow Flakes.


Supplies needed

Card Stock                      Old Olive, Elegant Eggplant and Whisper White
Ink                                   Old Olive, Elegant Eggplant
Stamp Set                        Snowflake Soiree
Punch                               11/4 Circle Punch
Accessories                     Basic Rhinestones for Bling, Circular scissor plus

Directions
Cut your base card 3" x 6", score at 3" and fold
Next cut your 1st layer 23/4" x 23/4" and attach to base card.
Then I used the Circular Scissors to make a 21/4" circle stamped that with the medium snow flake from Snowflake Soiree stamp set with Old Olive Ink.
Next I stamped the small snowflake with Elegant Eggplant and punch it out using the 11/4" punch.
Next I adhered the large circle to my base card and added Rhinestones.
Then I adhered the top circle with stampin dimensionals and added more Rhinestones for Bling.


 I am mailing it off today, and can't wait to see if they like it. Since I made this using snowflakes I am also entering in the first challenge for 2013 over at the new LNS Weekly Challenge Blog.

Thanks for stopping by and as always leave a comment and let me know what you think.

Jackie

Sunday, November 25, 2012

O Christmas Tree! O Christmas Tree!

Does anyone remember that song?
Well I do and my card is a tribute to our beloved Christmas Tree. I last few days I have been designing a card using the Scentsational stamp set my sister and I have. So if you would like the lyrics to O Christmas Tree click here! I am also submitting my card into a new challenge website http://52cct.blogspot.com/. It is there November Embellishment Challenge.
Pearls! now anyone that knows me knows this is right up my alley!!  I love using Pearls on everything. Thanks goes out to Ann Schach, who posted this challenge on her blog for me to find.

 Now on to my card.


I started with the base card 51/2 x 4 1/4 inch, the next layer is 5 3/16 x 4, second layer is 3 3/4 by 5.
Then I embossed the 1st and second layers, punched out the scallop circle and then stamped the Christmas Tree and I ran them both thru the Big Shot using the framlits Dies (Holiday Collection) on the tree and the Lacy Brocade on the scallop circle. It doesn't get any easier than this. A little bit of Ribbon and a lot of Pearls!!! and a Rhinestone Topper! How's that for some Christmas Bling?

Supplies:
Card Stock                     Raspberry Ripple, Gumball Green and Whisper White
Stampin Up Ink              Gumball Green and Garden Green
Ribbon                           Gumball Green Stitched Satin Ribbon
Stamp Sets                     Chock Full of Cheer and Scentsatinal Season
Punch                             2 3/8 inch Circle Scallop Punch
Embossing Folders        Delicate Design and Lacy Brocade
Designer Paper              Be a Good Cheer (inside)
Bling                              Pearls and Rhinestones
Framlits                          Holiday Collection

I am off to do a painting class, on how to paint Winter Scences with mountains and water. When I finish I will post a picture of what I painted on here and my painting blog. 

I hope you have enjoyed your visit to my blog today.   As always your comments are important to me, and I do read each and every one.

Jackie

Friday, June 15, 2012

VC Rocks June Blog Hop

This month our theme was any size card. I chose to make a standard Vintage card that I cased from the very talented Sandi MacIver,  I saw this card on her blog a few months ago and just loved it.

If you have arrived here from the very talented June Reister blog  , then you are in the right place. If not, you can start at the beginning at the VC Rock Blog here at anytime.


Supplies:

Cardstock;                      Always Artichoke, Very Vanilla
DSP:                               Designerf Series Paper-Regal Rose
Framelits:                       Labels Collection
Embossing Folders:       Vintage Wallpaper, Snow Burst
Stamp Sets:                    Apothecary Art
Markers:                        Always Artichoke, Red Rose, Pretty in Pink
Ribbon:                          Always Artichoke seam binging
I also decided to destress the Vintage Wallpaper using Tea Stain from the retired Destressing Essentials. Added some Pearls for Bling.


I hope you have enjoyed my intreption of Sandy's card, it was easy to make and I just love working with the new framelits. Leave me a comment and let me know what you think of my version . Now its time to move onto see what  Robin Messenheimer has in store for you , I know it will be awesome. Just click here to move forward.


Thursday, November 10, 2011

Creative Sketches Challenge-CS56C

Welcome to this Thursday's Creative Sketch Challenge! The challenge this week was to make a card using the Colors below. I will have to admit it was a challenge for me to use these colors; Riding Hood Red, So Saffron and More Mustard. I would not have thought of these colors, but I am glad someone did.  They make great colors to play with for fall. Reminding us of the trees and bushes ever changing colors. 

Here is my card


As you can see I used a lot of layers to give this card a lot of texture. Here is close up of the layers that I used in making this card.


Supplies:

Card Stock                         Red Hood Red, So Saffron, More Mustard
Dsp                                  
Stampin Ink                        Crumb Cake
Embossing Powder            Copper
Stampin Up Chalks            So Saffron, Chocolate Chip, Always Artichoke
Ribbon                               Always Artichoke seam binding

Now for some fun I used the new stripes embossing folder  and I just loved the way that turned out, then next I used lattice embossing folder on the Dsp and so saffron card stock. Then I used my new color spritzer tool and spritz so Crumb Cake. I love this tool and wondered why I took so long to buy it. I will be playing with it some more.

I hope you enjoyed this weeks card, I know I did.  If you would like to join us this week go to: http://wwwcreative-sketches.com/ and submit your card by clicking on linky tools.

I will be waiting to see what you come up with.

Thursday, November 3, 2011

Creative Sketches Challenge-CS55S

Welcome to this Thursday's Creative Sketch Challenge! The challenge this week was to make a card using the sketch below.  What an awesome sketch to go by to make wonderful Christmas cards by.


Here is what I came up with:

Supplies:

Card Stock                        Always Artichoke, Whisper White and Cherry Cobbler
Stamp Ink                          Cherry Cobbler and Always Artichoke
Stamp Set                          Tree Trimmings
Ribbon                              Cherry Cobbler Quilted Satin  
Embossing Folder             Petals a Plenty
Bling                                 Basic Rhinestones

If you would like to join us this week go to: http://wwwcreative-sketches.com/ and submit your card by clicking on linky tools. I will be waiting to see what you come up with.

Thursday, October 13, 2011

Creative Sketches Challenge-CS52C

Welcome to this Thursday's Creative Sketch Challenge! The challenge this week was to make a card using these colors: Soft Suede, Cajun Craze, Basic Black and Crumb Cake.  As shown by the sketch below:


Aren't they just Yummy colors. I just love fall. Here is my card.


I used Soft Seude for my base card, Crumb Cake as my next layer and then I made a tree out of Basic Black, leaves out of Cajun Craze and for a little fun added a Rhinestone Owl. My granddaughters birthday is right before Holloween and she gets lots of spooky, fun cards. I think she will like this one. I also made her a girly card out of our new In color Wisteria Wonder. I will post that one later.
 
Supplies:
 
Card Stock                        Basic Black, Soft Suede, Cajun Craze and Crumb Cake
Ink Pad                              Soft Suede
Punches                             3 step Owl and little leaves(retired)and Decorative Label
Bling                                  Rhinestones

If you would like to join in,  go to our website at http://wwwcreative-sketches.com/ and submit your card by clicking on linky tools. I can't wait to see what you come up with.

Thursday, October 6, 2011

Creative Sketches challenge-CS51-1006-Sketch

Welcome to this Thursday's Creative Sketch Challenge!

As you can see this week challenge is awesome. Since I am new to SU I don't have all the punches, so I had to think outside the box a little. I chose Halloween colors for my card this week. 


Supplies:

Card Stock                           Pumpkin Spice, Black
Stamp Pads                          Basic Black, Versa Mark
Stamp Sets                           Home is where my heart is(retired)
Ribbon                                 Tangerine
Punch                                   Bitty Bats(retired)

Like I said I didn't have the square punches so I cut squares with my cutter and stamped the middle with the witch.  Cut the Pumpkin Spice and Black card stock on a diagonal.Used Versa Mark to stamp Trick or Treat on the Pumpkin Spice and Black card stock. Added the Bitty Bats and Ribbon. The card was easy and fun to make. I hope you enjoy my card.

If you would like to join in go to our website at http://wwwcreative-sketches.com/ and submit your card by clicking on linky tools. I can't wait to see what you come up with.

Saturday, October 1, 2011

World Card Making Day

How cool is that a day that honors all of us card makers.


History:
World Card Making Day began in 2006 as National Card Making Day. Founded by Paper Crafts magazine to bring card makers together at the beginning of the busiest card-making season of the year, it was first held on October 7, 2006. The initial celebration involved the Paper Crafts magazine audience only; however, due to the positive response it received and the worldwide popularity of card making, the holiday became known as World Card Making Day from then on.

Celebrating its sixth year in 2011, World Card Making Day is celebrated annually on the first Saturday in October. It's a day for the card-making community -- hobbyists, retailers, and manufacturers -- to unite and celebrate the connection and creativity that is the heart of card making. Join us in the fun on October 1, for World Card Making Day 2011! To check World Card Making Day out here is there website: www.worldcardmakingday.com


There are several sponsors this and OWH is one of them and is having a Blog Hop and if you want to join in on the fun go here http://operationwritehome.org/bloghop.html and click on the button.

Paper Crafts is having a awesome contest and fabulous prizes go check them out here: http://www.papercraftsmag.com/contests/2011-world-card-making-day.html

I know we don't need an excuse to make cards, but I think it is wonderful we have our own day. Now off to make cards and join in on the blog hops!!

Will post my cards later.

Thursday, September 29, 2011

Creative Sketches Challenge-CS50

Welcome to this Thursday's Creative Sketch Challenge! The challenge this week was to make a 5x7 mini scrapbook using this weeks sketch shown below.


I have to admit making a mini scrapbook page is challenging, mainly because I like to load the pages up. Here is my scrapbook for this week.

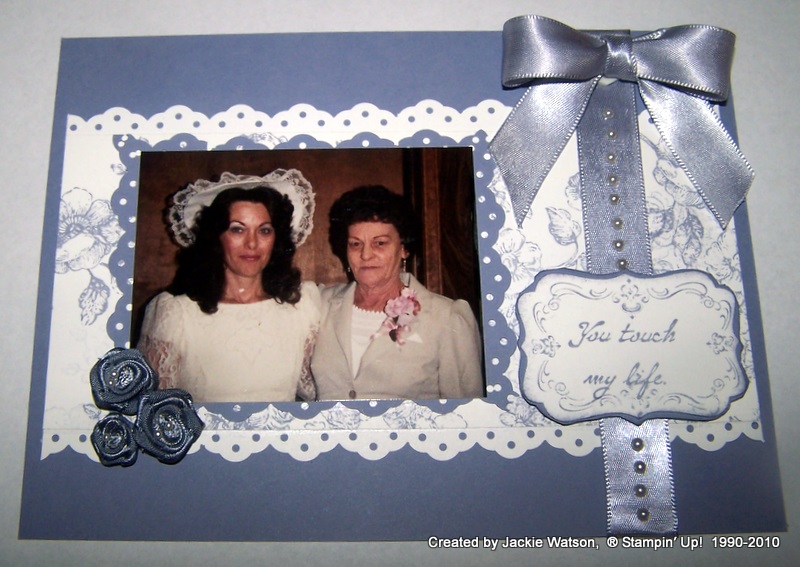
Once I picked out the card stock and decided that I wanted to stamp my own background using the large rose stamp from Elements of Style on the new in color Wisteria and Whisper White.  Then after spending all day going through photo's of the family I came across this photo of my mother and me at my wedding a few years ago. I decided to make a memory page since my mother has passed away since that day, but I loved her being there. My mother loved lace, flowers and very feminine things. So I got out my punches and made a lace mat for the photo and lace around the card stock. Took my white satin ribbon and sponge it too match the card stock (Wisteria Wonder). The sentiment is from a retired stamp set (Sketches). I inked the roses with Wisteria Wonder markers and for some added bling a lot of Basic Pearls. I hope you enjoy this as much as I did in making this tribute to my mother.

Supplies:
Card Stock                         Wisteria Wonder, Whisper White
Stamp pad                          Wisteria Wonder
SU Markers                        Wisteria Wonder
Punches                               Eyelet Border, Decorative Label
Ribbon                                White Satin
Stamp Sets                          Element of Style, Four Frames and Sketches(retired)
Other  accessories              Basic Pearls and satin roses(retired)          

If you would like to join in go to our website at http://wwwcreative-sketches.com/ and submit your scrapbook page  by clicking on linky tools. I can't wait to see what you come up with.


Thursday, September 22, 2011

Creative Sketches Challenge-CS49H-Fall/Thanksgiving

Welcome to this Thursday's Creative Sketch Challenge! The challenge this week was to make a card for Fall or Thanksgiving  as show by the sketch below:


Pretty cool sketch and here is my card.
I love this time of the year with the trees changing colors and weather changing. Opening up the windows and letting the gentle breezes come in clear the air. I start baking again and house fills up with the smell of cinnamon and other spices. Oops got off the subject there.

Supplies:
Card Stock                        Crumb Cake, Chocolate Chip, Soft Suede and Very Vanilla
Stamping Pads                  Versa Mark
Punch                                Lace Ribbon Border
Embossing Folder             Square Lattice
Embossing Powder           Classy Copper
Ribbon                              Always Artichoke
Brads are from one of Stampin Up retired Hodge Podge sets and the Happy Thanksgiving stamp is from another retired set.

Thursday, September 15, 2011

Creative Sketches Challenge-CS48T

Welcome to this Thursday's Creative Sketch Challenge! The challenge this week was to make a card using Lace and Flowers as show in my card below:


Here is my sample

I am into getting ready for the Christmas, planning workshops, all day stamp-a-stack and more. I loved this stamp set (Beautiful Season) from the new SU 2011-2112 catalog on page 45. So that is why I chose to make a Christmas card using lace, ribbon. I just love Vintage looking cards.

Supplies:
Card Stock                          Cherry Cobbler, Always Artichoke, Crumb Cake and Very Vanilla
Stamp Set                            Beautiful Season
Ink Pad                                Always Artichoke, Versa Mark
SU Markers                         Night of Navy, Bashful Blue, Always Artichoke, Cherry Cobbler, Soft    
                                            Suede, Crumb Cake, So Saffron
Ribbon                                Early Expresso Quilted Satin (from Holiday Mini)
DSP                                    Holly Berry Bouquet(from Holiday Mini)
Punch's                                Curly Label, Eyelet Border
Accessories                         Basic Pearls, Distressing Essentials

This week was all about  having fun and thinking outside the box. I love mixing textures and layers to make one of a kind Vintage cards.   Tell me what you think! By the way all of the products I used can be purchased right here from Stampin’ Up.  Go to the Shop online button at the top of blog. Thanks for stopping by and come back soon. Feel free to leave a comment, I love reading each one.

If you would like to join in go to our website at http://wwwcreative-sketches.com/ and submit your card by clicking on linky tools. I can't wait to see what you come up with.

Thursday, September 8, 2011

Creative Sketches Challenge-CS47C

This week challenge is a color challenge and I must confess I would never had put these colors together, but to my amazement they are gorgeous together. They are Cherry Cobbler, Basic Grey and Peach Parfait.

Here is my card:


Supplies are all Stampin Up Products:
Card Stock                                  Basic Grey, Cherry Cobbler and Peach Parfait
Ink Pad                                        Basic Grey
DSP                                             Paisley Petals
Lace                                             Victoria
Brad                                            Antique collection
Embossing Folders                      Vintage Wallpaper, Perfect Polka Dots and Square Lattice
Stamp Sets                                   Because I Care, Four Frames
Punch                                           Decorative Label

I wanted to do something different this week so I embossed each piece of card stock with a different Textured Impression Embossing folder. Then I sanded the Vintage Wallpaper to give it a more aged look. I haven't gotten my Simply Scored Tool yet so made my medallion the old way by cutting a strip of DSP 1x12 and scored one side at 1/2 inch and flip over and scored the other side at 1/4 inch to give the peaks and valleys. Then I folded along the score marks and added a punched out circle to give stability. I used red sticky tape to adhere to my lace strip.  I think this is the first Vintage Card I have made without  any bling.  I hope you have enjoyed my card this week.

Come join in by going to http://wwwcreative-sketches.com/ and submit your card by clicking on linky tools. I can't wait to see what you come up with.

Thursday, September 1, 2011

Creative Sketches Challenge-CS46S

This week challenge is a sketch to show how layering and using my favorite SU tool The Big Shot. Here is my card I entered. 


Supplies:
Card stock                          Elegant Eggplant, Crumb Cake and Wisteria Wonder (new in color)
Stamp Set                           Elements of Style, Birthdays Count
SU Markers                        Elegant Eggplant, Old Olive
Bling                                   Rhinestones, Jeweled brads

Since I am a new to the Su family I don't have a lot stamp sets, but manage to mix old and new to come up this week card. I love anything purple so I chose to mix Elegant Eggplant with our new Wisteria. The card easy to make using my Big Shot and Top Note Big Die.  I hope you enjoy this week's sample, I know I enjoyed making this week card.  If you would like to join in go to http://wwwcreative-sketches.com/ and submit your card by clicking on linky tools.  I can't wait to see what you come up with.


Thursday, August 25, 2011

Creative Sketches Challenge-CS45H

This week challenge was  a sketch with a holiday theme. We could choose from Halloween or Fall. This time a year gets me thinking about Fall, Thanksgiving and yes Christmas. So I chose a fall card, since I haven't received my new Halloween goodies yet.
  Here is my sample,  I had a lot of fun designing and making this one.


Let's get started, here is a list of supplies I used.
SU Markers                  Soft Suede, Lucky Limeade, Pumpkin Pie, So Saffron
Card Stock                    Lucky Limeade, Cajun Craze, More Mustard, Natural White, Very Vanilla
Ink Pad                          Soft Suede
Stamp Sets                     Lovely as a Tree, Season by Season
Punches                         Eyelet Border, Scallop Oval and small oval
Other accessories         Hemp Twine, Victoria Lace and some yummy Chocolate Pearls

I hoped you enjoyed my card this week, I know I had fun making it. If you would like to join us this week go to: http://wwwcreative-sketches.com/ and submit your card by clicking on linky tools. I will be waiting to see what you come up with.


Saturday, August 20, 2011

My Frist Christmas Card

I belong to a wonderful group of ladies in a group called VC Rocks and this month swap was Christmas/Winter. So I decided to use one of my new Christmas stamp sets from the new 2011-2012 Catty.
Snow Much Fun

I just love snowmen and these are adorable. I imagine you will see more of these little guys.

Here is my card;


Supplies:

Card Stock                         Crumb Cake, Real Red and Soft Seude
Markers                             Soft Suede, Real Red, Crumb Cake and Pumpkin Spice
Stampin Ink                        Soft Seude
Stamp Set                           Snow Much Fun
Other assessories               Crimper, Aqua painter, Embossing folder- Petal's a Plenty                        
                                            and Basic Pearls.

I hope you enjoyed my sample today and can't wait to show you more. Christmas is my favorite time of the year.

Thursday, August 4, 2011

Creative Sketches Challenge-CS41S

This week's challenge is a sketch that uses punch's, dsp and much more. I found it a lot of fun to do.
Here is my card that I submitted:

I decided to use SU new In colors, DSP, and Decorative Label punch. To glam it up I used SU Basic Pearls, Victoria lace and some Crystal Effects to the flowers. By adding some Butterflies from some retired dsp I gave it some contrast.
Supplies:
Dsp:                    Paisely Petals and Victorian Vintage(retired)
Card stock:          Lucky Limeade, and Very Vanilla
Stamp Sets:         Four Frames and Elements of Style
Ink Pad:               Soft Suede
SU Markers:        Real Red and Lucky Limeade
Punch:                 Decorative label
Embossitt:           Beautiful Wings
Ribbon:               Victoria lace
Assessories:        Basic Pearls and Crystal Effects

I hope you enjoyed my card.  If you would like to play along with us go to: http://wwwcreative-sketches.com/ and submit your card by clicking on linky tools. I will be waiting to see what you come up with.

Thursday, July 28, 2011

My fabulous find today!!!

Here is Dawn Rapsas  blog http://www.inkeruptildawn.com/ she wanted a list of blogs that use SU products and I thought that was a great idea. If we add our names to the list and post on each others blog we can increase traffic to our own blogs.

So here are a few blogs for you to check out:

Lydia blog:          http://lydz-creations.blogspot.com/
Anne's blog:        http://annesemptynest.blogspot.com/
Tina W blog:       http://theserenestamper.blogspot.com/
Linda C  blog      http://www.craftystampin.com/
Krystal's blog:    http://krystaleskorner.blogspot.com/
Beth F  blog:      http://bethfesperman.blogspot.com/

Angela S blog:   http://stampinkology.blogspot.com/
Kristy A blog:    http://www.kristyalexander.com/
Sue N blog:        http://stampingvogue.blogspot.com
Tonja R blog:     tonja@stampingwithtonja.com

Monday, July 11, 2011

I AM A WINNER!!

I just found out I won this awesome cardholder from Carey at http://pedstamperstampingtreehouse.blogspot.com/  I loved her card holder collection and I can't wait to get mine.

This weekends Blog Hop was awesome and I learned a lot. Can't wait to go back and check out the tutorials

As I promised: Bottle cap Magnets and Gift Set

Here is my tutorial that I promised from this weekends VC Rocks Blog Hop.  I hope you enjoy and have fun making your own.

Supplies I used:

Cardstock: Island Indigo, Pool Party all from the New 2011-2012 Catalog
DSP: Paisley Petals ( from the new 2011-2012 Catalog)
Punches: 2-3/8 Scallop Circle, 1-3/4 Circle, 1-3/8 Circle, 1” Circle, ¾ “and the
New Lace Ribbon Border Punch (from the new 2011-2012 catalog)
Ribbon: Whisper White Satin Ribbon (inked to match using pool party)
Accessories: see through tin, bottle caps, magnets, Crystal Effects and Rhinestones

Directions:
Assemble each magnet. The punched out circles from dsp, or anything you stamp. (On mine I punched out the images of the flowers and leaves from the new DSP Paisley Petals for the end magnets and stamped and colored the center one).


Adhere the punched piece into the bottle cap (with Snail Adhesive or Sticky Strip) just to hold it in place.  (Note: It is important that the piece is secure because when the Crystal Effects is poured in, the piece will "float" otherwise.)

Pour Crystal Effects into the bottle cap on top of the image.


Allow the pieces to to dryabout ten minutes or until it's beginning to appear clear. Then apply a Rhinestone to the piece. Literally "drop" it onto the Crystal Effects so that it doesn't sink or get covered up by the liquid.


Allow the bottlecaps to dry at least overnight and be sure that they are placed on a level surface so the liquid dries evenly.

Inside directions:

Cut the strips of cardstock and DSP to go inside the tin. Bottom layer is 5-1/4 x 3-1/2,  for the next layer I used the reverse side of the DSP and cut it 5-1/4 x 1-1/4. I adhered the pieces together, then I rounded the edges of the bottom piece and glued it to the bottom of my tin.


Then I cut 2 pieces 1-1/4 X 5-1/4 one of cardstock and one of DSP for the belly bands. Then I ran the cardstock thru our new Ribbon Lace Border punch. Coolist punch ever!! I love the lacey look.


This is what they look like after glued together along with the scallop and circle tag.


Once completely dry, adhere the magnet onto the back of the cap.

Crystal Effects works for this but be sure to let it dry completely once again. But any adhesive will do as long as it is completely dry.

After the bottlecaps and tags are dry, assemble. Put the magnets inside and line up on strip. They will stick to the tin because of the magnets.


Then I closed lid,  flipped the tin over and added belly band and tag.


I finished the tin by adding a Ribbon bow.


I hope you enjoyed my verison of Carla Brasher's gift tin.  If you have any questions or need any additional information, please don't hesitate to contact me!

Jackie Watson
jackielwatson2009@hotmail.com

Saturday, July 9, 2011

VC Rocks July Blog Hop

Thank you for visiting my blog and joining us for a weekend of amazing blog hopping. You won’t be disappointed. The hop officially kicks off at 10AM Eastern/9AM Central, 8AM Mountain, 7AM Pacific on Saturday and will run through the weekend.  If you are following the Blog Hop, and you just came from the fabulous Elizabeth Harris' blog,  then you are in the right place. 

If you have just joined us or got lost along the way you can start over at the beginning here.

This month's  theme is Anything but a Card, now that can be anything from a box, basket , business card holders or  jewelry -- the list is endless.  For my project I chose to do this gift tin, I saw one just like it on  Carla Brasher blog. I liked it so much I decided to cas it. 

I moved this summer and my neighbor has been such a great help to me and my family and she has never asked for a thing in return, so I thought why not make something for her as a gift and show it here on the blog hop.

Supplies I used:

Card stock: Island Indigo, Pool Party all from the New 2011-2012 Catalog
DSP: Paisley Petals ( from the new 2011-2012 Catalog)
Punches: 2-3/8 Scallop Circle, 1-3/4 Circle, 1-3/8 Circle, 1” Circle, ¾ “and the
New Lace Ribbon Border Punch (from the new 2011-2012 catalog)
Ribbon: Whisper White Satin Ribbon (inked to match using Pool Party)
Accessories: see through tin, bottle caps, magnets, Snail Adhesive, Crystal Effects and Basic Rhinestones

I hope you have enjoyed the projects I made for you today. For anyone interested in how I made this tin I will be posting the tutorial on Monday night or Tuesday morning. The tutorial is so long, I thought I would post it separate

And, as you leave my blog, please hop on over to the fantastic blog of Marisol Gutierrez.


Related Posts Plugin for WordPress, Blogger...